Showing posts with label 1st attempt at.... Show all posts

04 August 2013

Fear of Living Large

...on canvas, that is!

Ready to start my FIRST EVER painted canvas.

I'm back! It HAS been too long, hasn't it? :: insert cricket sound :: The good news is that Effy has inspird me with her 30 posts/30 days challenge, which started on August first. Though daily posting's not likely, it's gotten me off of my keister!

Frustrated, one of the reasons I stopped blogging was that I stopped using my desktop computer when I got my iphone last summer and couldn't attach photos via Safari! Now I am using Puffin for the ipad.. and that should do the trick!

So for my return post, I thought I'd share the (rather earth-shaking) decision I made yesterday to "Go Big" after 1.5 years of creating inside my art journals! yay! Here's a recent 10" x 10" page in my altered book:


And here's the finished canvas, a whopping 26" x 18" ~


With a busy creative life and a rich inner life, I'm anxious to share this journey and I hope you are just as anxious to return. 


19 February 2012

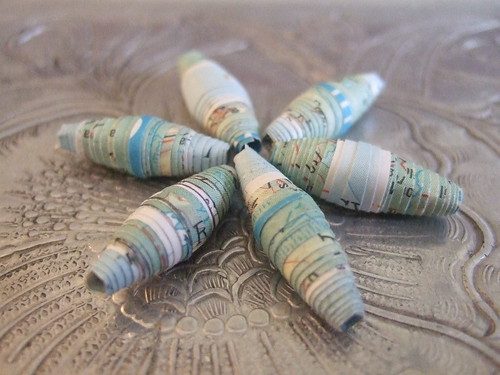
Paper Beads from Vintage Maps

1st attempt! WIP by cookievf
1st attempt! WIP, a photo by cookievf on Flickr.

As a part time jewelry designer, this is a great solution to finding just the RIGHT color!

A "WIP," I will be making a few more sizes and shapes, in a similar color palette, to be paired with a cream-colored dogwood flower pendant. For added sparkle, Swarovski crystal bicone (beads) in teal sound just about right!

12 August 2011

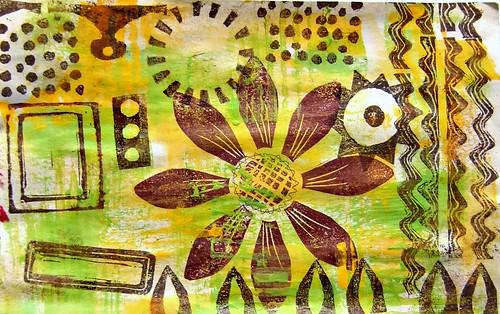
Basic Stamp Carving

more stamping by cookievf
more stamping, a photo by cookievf on Flickr.

Why buy basic shapes when you can carve them yourself! A few months ago I managed my first attempt at basic carving with a Speedball lino cutting tool and a block of flexible, pink Speedy-Carve. Dick Blick carries a 9" x 11 3/4" sheet for $21.00. Erasers are great for carving too!. And don't forget to save your wine corks :D

I stamped this "sample set" with a brown pigment inkpad on a sheet of blank newspaper; a nice weight to use in collage. I also used it to make my painted background papers, shown in an earlier blog post and on flickr as well. View the carved stamps and the painted papers here.

07 April 2010

~ follow up post ~

Last year, 17 artists participated with me in this artezine board book swap with Christine Shebroe as the hostess. You can view the swap in its entirety here.

It was WAY BACK in July 2009, that I posted a few steps here to illustrate the WIP on the cover. I always meant to share the rest of my pages and I guess, better late than never! As with any first attempt, i still recall my inner critic was in "over-drive" and, in the end, I produced something I was very happy with! Moral of the story??? ... SILENCE that pesky inner critic and you will be surprised to see what lovely things can happen!


25 October 2009

Stretching Myself


For October, I am signed up for the first month of LK Ludwig's (online) POINT AND SHOOT journaling class. In the past I'd visited her blog and became even more intrigued when I purchased her book "True Vision: Authentic Art Journaling." Then you can imagine my reaction when I learned that she would be teaching an e-course!

LK is offering 31 days of inspirational techniqes, instruction and prompts. There are over 80 members signed up for the 1st month who hail from all over the globe. Here's a small sampling:

- longmont, colorado, usa
- georgia, usa
- winchester, england
- seatlle, wash, usa
- esperance, western australia
- portland, oregon, usa
- somewhere in belgium
- southern california, usa
- montreal, canada
- frederick, maryland, usa
- Brussels, Belgium
- idaho falls, idaho, usa
- erie, pennsylvanis, usa
- altamont, new york, usa
- lethbridge, alberta, canada
- near wellington, new zealand
- london, england

As I begin to dig down into the THOUSANDS of images I have stored on my computer, my teacher says I will be revisitng "notes from my super-creative, subconscious self." We will be adding our own thoughts & experiences as well as quotations & poems plus painting, scratching, coloring and who-knows-what!

So far, I am extremely pleased with the content of this course and highly recommend it. And I promise - pics and W-I-P to follow!

19 October 2009

Suzi Inspired!! MWAH!!


Anxious to try my hand at original art, I created this 4x4 with one of a few small pen sketches I did recently on a Post-it pad. I was inspired after watching Suzi Blu's workshop video for "The Goddess & The Poet" ~ (thanks, my friend!)

I JUST GOTTA TAKE THIS CLASS! For $55.00 you can sign up for it here.

02 July 2009

Altered Book Swap Part 2... step-by-step

I have always been considered someone who loves detail! It has helped me in my work, my relationships AND in my art as well. Add to that an inquisitive mind and you will understand exactly why I love TECHNIQUES and the ever-popular WORK-IN-PROGRESS, or WIP, from either point of view. I enjoy documenting them myself ... even in the garden... and reading about them too!

The best part was finding a book to alter with a die-cut cover!


"Belly Button Book"
- by Sandra Boynton

The very first step (not shown), as with all board books, is to sand each page lightly to remove the finish. This will give it "tooth" so they can accept paint.

Naturally, as this was my very f.i.r.s.t. altered board book, I tried to stop whenever possible - grab my camera - and set up for a photo. Here are most of the steps I used to create the front cover:

I grabbed a few magazines and cut several images and collaged the cover so there would be some added dimension once I attached the next layer.

Next I crumpled several torn pieces of pink, orange and red tissue paper adhering them with decoupage medium. This is an easy technique that's alot of fun because you simply smoosh the tissue in random peaks and valleys. Once it dries completely, the effect is very pretty!

A sturdy punch was used to make a hole in the cover. Next, I added a copper eyelet so I could attach a "dangle-y" at some point! Use your imagination to add ribbons, cording, leather, beads, a section of chain, charms, a tiny photo, a stamped tag, fibers or even fabric. No limits!


My favorite technique is any type of image transfer and I knew instantly that it should be a strong visual to entice you to open the book. Not only did I find one that appealed to me, but oddly it was framed inside of a perfect circle. The decision had been made for me!


Using soft gel medium, I applied several layers in opposite directions, drying between each layer. At this point, it doesn't matter if you cut it out before or after the process. Some people may prefer a "margin" to hold on to while rubbing.

This time I worked on top of my non-stick craft sheet but mostly I spread open a catalog and just flip the pages as they get dirty. R-E-C-Y-C-L-E, R-E-U-S-E!!


Every mixed media artist needs a squirt bottle that has a fine spray. It's wonderful to use with alcohol inks, but that's a future post.

Some transfer mediums instruct you to immerse the item in a bowl of water for 10 minutes, which I tried, but didn't make much difference here. This method is trial and error and you will find a way that works best for you. I simply spray and rub the paper from the back, slowly and repeatedly many, many, MANY times... the result is more than worth the effort, as you will see when you do it. This view is the reverse side, partially completed. TIP: I always print at least 2 images just in case I tear one in the process!! I lost some of the color here and had to begin again.


Perfect!


To make the "dangle-y" I wove some unwaxed linen cording, used for bookmaking, through the eyelet, strung a few beads and attached a metal rimmed paper tag. Next I covered the back with strips of copper foil used for soldering and flattened with a bone folder.


For the front of the tag, I layered 2 white paper flowers, cut a green flower for the leaves, added a swarovski crystal for the center and finished with a few embellishments using my gel pen.


I highlighted the inside rim of the circle and also surrounded it with dots using a gold paint pen. The dots are outlined with a black permanent marker and, as much as I wanted to add a title, I stopped here deciding "less is more!"


Click for a link to see all 17 books in the art-e-zine Altered Board Book Swap!

More WIP pages to follow...

18 June 2009

Altered Book Swap!


I participated along with 16 other artists in this fab/fun swap hosted by Christine Shebroe. Take a peek at all the lovely pages that have been scanned and recently posted over at ART-E-ZINE!

It was my first attempt at altering a children's "board book" and I found it to be an easy project due to the small number of pages required for this swap.

Lucky me, I received my TRAVEL-THEMED book from Carol Barnes, all the way from Down Under! Be sure to take a closer look at the second spread featuring her a-m-a-z-i-n-g fabric art representation of Ayers Rock/Uluru, one of Australia's most recognizable natural icons!!

Next post: some of my work-in-progress pages.


cover detail "flower girlz"

10 January 2009

A Little Experiment

"Gratitude" 12 x 12 - 1st Digital Scrapbook page


About a year ago, my DH surprised me with a long-awaited copy of Photoshop Elements. 8-10 hours later I knew just enough to make a few collages, nothing very advanced. And then I moved on... still frustrated by the steep learning curve.

A few weeks ago I asked an online friend if she had any links or tutorials to recommend (Kimmie from The Challenge, on NING - website link is over there ->) and this layout was the result!

I've always been fascinated with documenting my ancestry, scanning treasured photos for future generations, preserving their stories and learing MUCH along the way! In my growing collection I have pictures of 7 (out of 8) great-grandparents and now.... 3 of my great-grandparents. Anna Zurn Cook is one of those 7 and Barbara Grupp Zurn, her mother, is one of those 3. They are from my father's branch of the family tree and I have documentation tracing Barbara's immigration to the U.S. in 1837 from Aalen, Germany. Over the next 2 centuries, many of her descendants remained on the East Coast in both PA and NJ, not far from Philadelphia, including myself and my mother's side of the tree.

They lived in an era of extremely difficult times, especially for a woman, and I wanted to honor their sacrifices in my first Digital Scrapbook Page. I am eternally grateful to both my great grandmother and my great-great grandmother and many others that I will be scrapbooking.

This is only the beginning!

28 September 2008

freehand freedom - my journey


It was Feb '08 that I went out and purchased a sketchbook and this is one of my first attempts! I just created a new Flickr set of the same name tonight because I started to sketch again, slowly but surely, and I'm very excited about it and anxious to continue!

I come from an artistic family ~

- my father snapped and developed several BOXES of photos as a youth, beginning in 1936 at 16 years old and continued throughout his entire life! Well into his eighties he submitted a brand new series of photos called "From the Forest Floor" for juried review at Mount Snow, VT's "Art On The Mountain." Even though he was turned down, dad never stopped believing in his abilities and continued adding to this collection!
- he also took oil painting classes from my mom's step father. One of my favorite winter landscapes hangs in my living room!
- my father's father drew several, professionally framed, pen & ink drawings at the turn of the LAST century. Four of them grace my walls.
- my father's sister, now 92, is an accomplished (hobby) painter & pastel artist.
- my mother's mother's father was a "decorative painter" of furniture. Just this year I located a copy of the 1880 census which lists that as his profession at 17! Many years later, he started a successful furniture finishing business (stains, lacquers, varnishes, etc) that is still in business today, 133 years later. QUITE an accomplishment! After a quick search, I found the company website tonight! ...where you can read about the history (Est 1875).

I have always had an artistic soul yet, of all the many things my parents exposed me to, photography is the only form of art that I pursued into adulthood. In my tweens & teens I had a solid feeling for lettering and perspective and I am grateful for my father's influence. It came to me quite naturally and, although I dabbled briefly in ballet, poetry, acting and drawing, nothing ever really took hold of my attention and HELD IT. I've had the opportunity to develop an eye for composition, detail, negative space, line, texture, color and observation as a result of my 25 year love affair with photography. The next brick in the foundation was when I learned about rubberstamping and cardmaking 10 years ago. I've been enamored with Paper Art ever since!You can only imagine the THRILL I felt when I discovered mixed media collage in April 2006. Thanks to the internet, my eyes were opened to a whole new world of artistic expression, and since then I have grown both artistically and personally in SO MANY WAYS. After 2.5 years, I feel as if I am still at the beginning of a very precious journey!


Thank you for sharing it with me! - xo

03 December 2007

Maiden Voyage into PS!

DH surprised me the other day. While upgrading my PC, he had to make a Staples* run for a new scanner and came back with with Photoshop Elements 6.0. !!!

I decided to post it for those of you that have not yet explored the digital world of collage and photo/image editing. I spent 5 hours last night on my VERY first attempt and then lost it! Now I am careful to SAVE! After another 3-4 hours tonight, voila!

Here is my very first collage using custom brushes (chinese chop used for both borders & "shadow-like" bumble bee).


*Staples is an office supply store in the US & elsewhere

28 November 2007

(My 1st) Skinny Book Swap!

Please drop by The Altered Abbey for LOTS more information on this fantastic swap. More players are still needed (due to drop-outs) so please follow the link and scroll down to the bottom of the page. Simply fill in the message form to contact the fabulous Chrysti Hydeck!

"You Are Enough"
-colors are not accurate in this scan due to the use of metallics-
see bottom photo

Simple "back" design, using similar technique to "inky layers" from Bernie Berlin's book.

Here they are spread out before shipping! And, since I signed up for a second book, there are 26 other pages still IN PROGRESS.