Showing posts with label art journal. Show all posts

09 November 2019

Update + Local heART Journaling Classes

Update!

In 2009, I discovered art journaling and it has been life-changing. heART journaling, for me, is a creative outlet for self care and one that I have been practicing for 10+ years. Let me share a little bit about what it means to me..

It begins with the story of a late bloomer and my mantra, IT’S NEVER TOO LATE ..because it was 20 years ago that I rediscovered my creativity and that was after a 25 year lapse! The years of my youth were spent with a Sail, but no Rudder… and certainly no Anchor. My focus was outward. Creativity has grounded me.

As for my re-discovery, it began with rubberstamping, card making, scrapbooking and memory books. Next, I came across mixed media collage that allowed me to add paint, collage and glue to my toolbox. I incorporated female images, mostly vintage and was beginning to sketch faces. This is when my art began to feel more personal and relatable yet still very two dimensional as I was working on separate pieces of card stock and cardboard.

This is where it gets exciting! When I came across art journaling I could finally put down words and everything had a home, in one book THIS FELT SACRED. And the more open and honest I’ve been on these pages the more it has felt like a coming home to myself. And I can look back and remind myself how far I’ve come.

Teaching!

I began to teach locally in 2018, a life-long dream come true. I taught two 4-week sessions in the Fall, titled “Grief Through Art Journaling” sponsored by New Milford VNA, where I volunteer. And in Feb 2019 held a day-long retreat with owner, Rebecca Doring, at Quiet Spruce Wellness Center on Bank Street. She taught a morning and an afternoon meditation and each was followed by an art lesson in our journals.

The next series of workshops will be held locally, with both day and evening sessions available, starting in Jan 2020. There will also be a private Facebook group for participants. For more info and to be added to the mailing list, please contact Vicki Cook: cookievf@yahoo.com


04 August 2013

Fear of Living Large

...on canvas, that is!

Ready to start my FIRST EVER painted canvas.

I'm back! It HAS been too long, hasn't it? :: insert cricket sound :: The good news is that Effy has inspird me with her 30 posts/30 days challenge, which started on August first. Though daily posting's not likely, it's gotten me off of my keister!

Frustrated, one of the reasons I stopped blogging was that I stopped using my desktop computer when I got my iphone last summer and couldn't attach photos via Safari! Now I am using Puffin for the ipad.. and that should do the trick!

So for my return post, I thought I'd share the (rather earth-shaking) decision I made yesterday to "Go Big" after 1.5 years of creating inside my art journals! yay! Here's a recent 10" x 10" page in my altered book:


And here's the finished canvas, a whopping 26" x 18" ~


With a busy creative life and a rich inner life, I'm anxious to share this journey and I hope you are just as anxious to return. 


08 March 2013

Art Journaling My Pants Off!

my happy place

Although I fully intended to begin Volume II of my Book of Days* on January 1st, it seems my journal had a different plan! In a last-minute rush to complete Volume I at the end of December, something-? made me decide NOT to tear out the last few pages of my altered book and let things unfold, organically. 

8 single pages and 3 double-page spreads later..

I finished almost exactly at  MIDNIGHT on January 31st. Ha!

So on Feb 1st, I began another fabulous journey to lose myself and find myself, through art, by just LETTING GO  

* current Session #1 with Effy Wild ends march 31, next session #2 runs: 1 Jul - 30 Sep. For more info, check out  bookofdays.org. You can also sign up via her NING commuity, theglitterhood.org free of charge and discover all sorts of fabulous art journaling FUN! 

11 October 2012

Why I Blog

Blogging, for me, is like keeping a diary. It's also an exciting way to keep in touch with friends and family, a chance to practice the art of expression through the written word and through photography..   maybe even to inspire another person in some small way.

I also believe that the only way to find kindred spirits, is to take the time and make the effort and i've been happily blogging my life story for almost 6 years. Thank you for stopping by to share my journey and I will work even harder at keeping in touch!

Scroll down to see a few of the highlights from the last 2 weeks.

Good times with good friends

Random quick-sketch during live-stream with Dede Inkwell

Scanned more CLASSIC family photos (ca. 1960, lower left) and shared them with cousins!

 Hung out with mom, while she visited for 4 days

Went out for pear/gorgonzola pizza, sushi & a movie date!


Made a rubberband journal/notebook for a friend

 Started...


played...

finished... & now shipping off some happy mail!

Still arranging all of the elements & probing the accompanying thoughts/feelings that come up when asking "what am i doing here?" Self-work is always rewarding & even cathartic! Amen.
 
So, back to my joy, working in my art journal ~ but 1st, a caramel latte!


18 September 2012

Gratitude & Little Henry

After somewhat of a drought this summer, I'm happy to report I've felt a :: RUSH :: of creativity over the last week or so, and have been busily working in my art journals, being open to the process and letting the creativity f.l.o.w.

I also attribute my continued affection toward art journaling to the amazing wealth of inpiration I find in my artist friends:
..spending time catching up on their amazing work through their blogs, facebook groups and social websites on NING. Please take a moment to see the WEALTH of information, classes, youtube tutorials, workshops & private coaching that some of them offer!! 

And here's my latest spread about my 17 year-old father's favorite photography subject: his littlest brother, Henry and their family dog circa 1937 ~


03 July 2012

Winds of Change Are In the Air

First I want to say, unfortunately, I lost my last post! It was about the latest Ancestry.com discoveries which led me to an adventure in a pennsylvania cemetery that I promise to share more on later!

Back to more personal stuff. Lately, I feel a soft wind is beginning to blow in my life and I've been experiencing a loosening and breaking free of "debris" in several areas..

(1) now that summer has finally arrived, i've been able to take over a section of my summer kitchen table out on the porch. This has me feeling extra P.L.A.Y.F.U.L. as it's allowed for a constant flow of creativity.

my happy place!

(2) in June, i began my morning walks again and this weekend i experienced renewed determination to get healthy/lose weight.
only a bicycle ride away!
(3) I decided that I can no longer postpone an interstate road trip with my sweet mom to pay a visit to my favorite aunt laura. She is 95 and my mother just turned 89! We leave next week and will take a brief detour for an overnight in our favorite south jersey shore resort.


sisters-in-law

(4) I am thisclose to booking my first out-of-state art journaling classes.. hoping to pull it off! If I can, it will be at ink about it in westford, MA with the one-and-only kelly kilmer.

page from kelly's "New Directions" journal

(5) i just activated my first iphone!

(6) there is so much more life out there for me to sample, I'm not going to wait another MINUTE!


30 April 2012

Art Journal Page 18APR2012


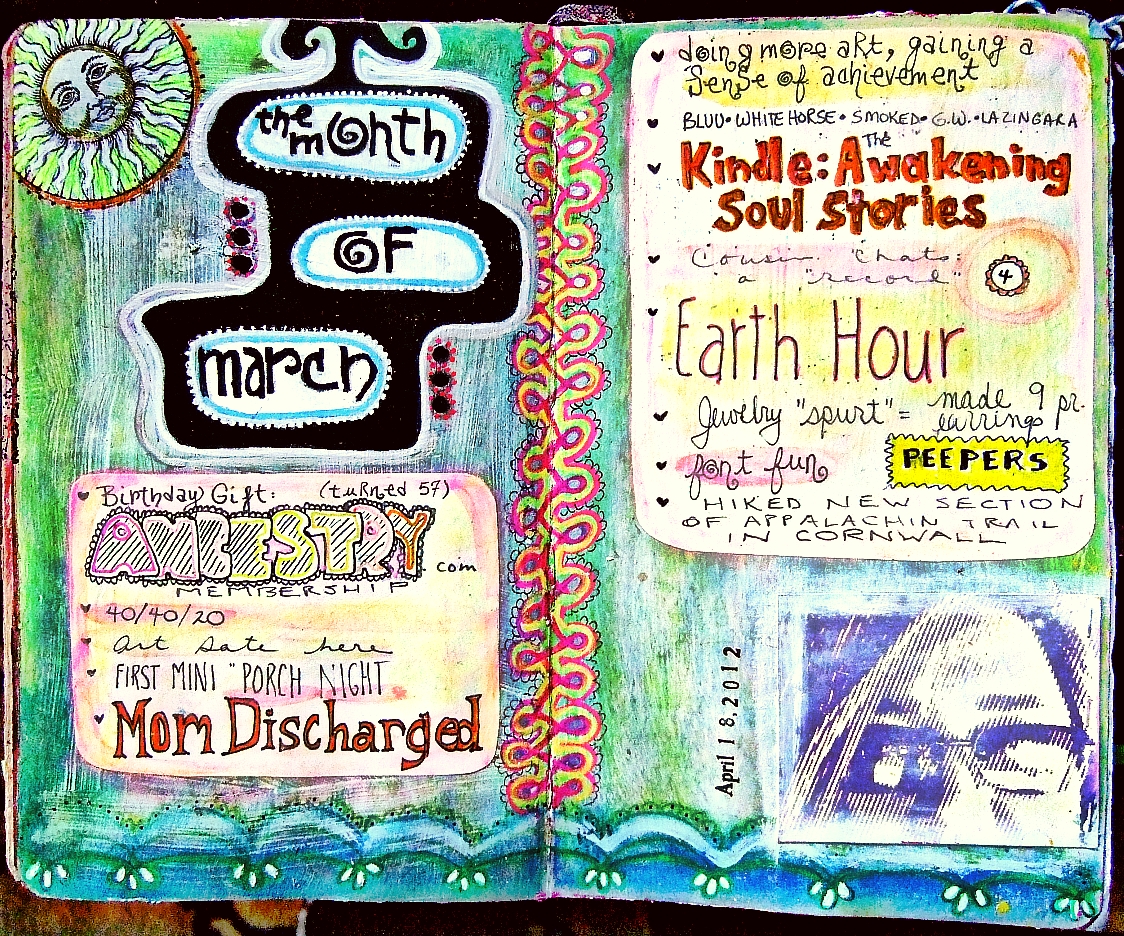
I had such a blast making my Month of March page!

Inspired by a new feature on Dawn DeVries Sokol's blog, called 10-minute-journaling, it was her first prompt called Time for a Quickie. She suggested we journal a LIST, highlight some of the words, the page could already have a doodle on it (it did, at the top), doodle some more, slap on a favorite photo and just re-LAX!


22 April 2012

Art Journal Page 17April2012

i am evolving by cookievf
 i am evolving, a photo by cookievf on Flickr.
I Am Evolving

side panel reads:
"when i'm feeling frustrated, knowing this will bring me peace... and when i think i have to have all the answers, it will help me to slow down and enjoy the ride"

bottom left: paisley design was hand "carved" simply with pressure from a mechanical pencil on craft foam w/staz-on ink
hand painted paper: black & white acrylic paint, spot made with foam "spouncer"

23 March 2012

Art Journal Cover 9Mar2012


Enjoying Effy Wild's "Book of Days" course via the facebook group. I've found that not only is it convenient to have easy access to the lessons and videos as well as being in regular touch with her, but the community has turned out to be a blessing for all involved!

My book, as posted earlier, is an old Time-Life Book of Nature Photogrpahy and is approximately 10 x 10". The size is a bit large for me and, darn it, the pages are glued, not stitched. So I have been adding reinforced packing tape where-needed and that has worked out perfectly! I just used a few mixed letters from my chipboard collection, gessoed over the painted serface and just had a BLAST decorating with my sharpie paint pens, mini pom-pom fringe, etc!

24 February 2012

Art Journal Page 19Jan2012


doodle fun with lettering, a photo by cookievf on Flickr.


Scraped some paint, messed around with texture, doodled with my white sharpie paint pen and added lettering.

My word for the year is MOTION, so I am making sure i put paint/pen to paper on a regular basis and having a blast doing it!

I hope you made some art today.

01 February 2012

DOBEDOBEDO


Altered book BEFORE

45 days could very well be my all-time record for days between posts which became the PERFECT EXCUSE for procrastinating, with "Where do i start???" ..at the beginning, of course.

After hearing so much around the idea of selecting one word for focus and growth in the coming year, I finally did it AND enjoyed the process of trying to distill all of my do's and don'ts to come up with one!

My choice for 2012 is MOTION


Altered book AFTER

As a matter of fact, movement of ANY kind is just what the doctor ordered as I get stuck inside my head with way.. too.. many.. hours creating ideas instead of creating art!

I can already sense a shift in energy:

~ There's been a thunderstorm of activity w/art journaling, doodling, sketching,
~ Enjoying Effy Wild's Book of Days (free) course
~ Learning much from Samantha Kira Harding's Journaling Deep
~Had fun letting loose with Traci Bautista's Doodles Unleashed
~ Reorganizing my studio (lots of "so THAT's where it was!")
~ I've begun to take "micro movements" towards a list of personal goals
~ I want to add dance to my list of physical activities (getting there)
~ I will NOT come up with any more excuses to stay inside due to the weather
~ My photography is on overload: 1001 pics so far this year.. that's 33 days!
~ Planning to introduce a new line of jewelry for sale, locally
~ Created a valentine-themed display for current jewelry line

All-in-all, my plan for this year is to DOBEDOBEDO!

03 December 2011

Art Journal Page 2Dec11

A few weeks ago, I decided to prep a few pages in my 8x5 moleskine sketchbook to help jump-start the journaling process. I started with a light application of white gesso, used a babywipe to blend in neocolor II wax crayons and stamped a repeating image with black staz-on.

Next I glued the photo in place and covered the left side with clear gesso. This helps to remove any sticky residue left behind, protects the 1st layer of color and adds texture, or "tooth."

Last night I finished this simple spread with a few doodles, a mhendi-style mandala and some random thoughts on my love of LETTERING. These finishing touches were inspired by Samantha Kira's cool, new email-based class, called Journaling Deep! This is a year-long class which costs only $10/month... and you can opt out at any time... or not! So, please be sure to check out a few of her (57) videos, here.

Sakura Pens used:
Gelly Roll MED White
Gelly Roll Metallic
Gelly Roll Souffle (kind of a mint green)

Bic Pen

28 November 2011

Technique: background layers


- PAINT/GESSO: the page started with an acrylic paint mix of a fairly bright turquoise blue & neon red which became this very interesting blue/grey. next i used a credit card to scrape a thin layer of white gesso,
- NEGATIVE STENCIL: once the 2 layers were fairly dry, I used this technique with an alpha stencil, a spray bottle, baby wipe & a paper towel. You can see the vertical "W V" in the center on the left side.
- BIC PEN: traced a different (backward) alpha stencil with a pen
- COLLAGE: cut, glued and painted several shapes from a found postcard. small pc of sheet music.
- PAINT MARKER: traced a third stencil using a mechanical pencil, due to it's small size then traced over it with a red Sharpie Paint Marker.
- NEO COLOR II: don't you just love the rich pigment of this crayon set? Used a wet application of orange for the border.

10 September 2011

Art Journal Fodder: Craft Foam


Thrift shop find!

Cut from a sheet of craft foam, there are two ways to play peek-a-boo! You can choose to reveal the POSITIVE/stamp or the NEGATIVE/stencil (or BOTH).

To use as a stencil, simply fill a spray bottle with watered-down paint or dilute alcohol ink in a small amount of household rubbing alcohol. To use as a stamp, brayer or use your fingers to spread a thin layer of paint onto a smooth surface, I use a 8x8" ceramic tile, press and stamp!

Tools used: pen, craft knife with a fresh blade and an "anywhere" punch!

27 August 2011

Art Journal Page 7Aug11


STEPS 1 + 2
Paint! Whoever said, "once you use paint in your art journals, it becomes addicting," was right! There's nothing more fulfilling than laying down that first layer of color, usually after I've applied a layer of gesso with a cheapo "chip brush."

APPLICATION
I prefer to use a credit card to apply my acrylic paint because it's fast, clean-up is easy (keep a shallow bowl near-by, filled partially with water - or clean off immediately with a baby wipe or a rag), you use less paint and the BEST PART is that your pages won't stick. Rather than wasting leftover paint, just scrape it onto future pages (see my next post!)

TECHNIQUE
Start with a lighter color. Then, after scraping the 1st layer of paint across your page, scrape a dark or medium shade overtop of it. Next, use your fingers to drip random drops from a glass of water or block the nozzle on a spray bottle with a finger, for larger "glops!" Wait about 1 minute, blot the excess water with a paper towel and SCRAPE to reveal the lighter color underneath. Keep adding water, as needed.

LAYERS
Paper and I have always had this love affair. 10 years ago, i referred to myself as a "paper artist" and I've got a room-full to show for it! Vintage magazines, nat geo (used here), old dictionaries, ledgers, primary schoolbooks, ephemera, postcards, cab cards, sheet music, scrapbook paper, cardstock... the list goes on. So! it's super fun to incorporate that extra layer either before or after gesso or in between paint layers.

Another layer that's a must for me is using handcarved stamps and grabbing something from my "mark making" collection such as bubble wrap, sequin waste (used here), old shower curtain grommets, corks (used here)...


24 August 2011

the uglies


we all have 'em... in our Art Journals, that is! "let the inspiration flow" - guess it wasn't flowing MY way, that day, lol.

I've read both sides of the keep it or paint over it discussions, and truthfully, only you can make that call. For me, I got depressed every time I looked at it. About 5 weeks passed, I bought a few alphabet stencils in a Thrift Shop and had an "AHA" moment. Next, I simply pulled the tape off -used a little red acrylic paint and a spouncer to re-do the title. (luckily the old one was on masking tape!!) And... SCORE!

05 August 2011

Art Journal Page 18Jul11

painted a wash of green paint over a self-portrait,


"crackle" rubber stamp cube, in brown ink,


torn pieces of vintage wallpaper,


new fave color duct tape,


deco tape,


pink porfolio oil pastel,


applied molding paste with corrugated cardboard for texture.

29 July 2011

Art Journal Page 13Jul11


Products/techniques used:
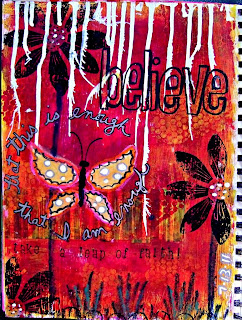
- Gesso is always my first layer.
TIP: I prep all of my pages with gesso first for several reasons. 1) Using a "chip brush" gives me added texture, 2) laying down a solid, opaque white base makes my colors POP, 3) gesso prevents the paint from soaking into the paper so, again, more pigment is visible.

- Several layers of acrylic paint were scraped on with a credit card.


TIP: If you don't want your colors to blend, sometimes creating a muddy appearance or (GASP!) turning brown, then use a blowdryer or heat gun drying each layer of paint completely. This will ensure that each color remains pure.


- Bubble wrap or sequin waste!


- I added the white drips across the top of the page using Speedball white calligraphy ink.
TIP:
Blowing paint or ink drips with a straw helps to spread it out and pushes the liquid further down the page.

- The butterfly wings are torn vintage ledger paper and are colored with sharpie "metallic" and poster paint pens.

- Just above "take a leap" I applied several strips that I cut out of a magazine ad.

TIP: I always try to use collage for added texture and layers. If you adhere them with gel medium or mod podge, be sure to cover the top as well. After painting over collaged bits, this gives you the option of wiping some of it away allowing some of the image to show through. Clear gesso works also.

- I used a hand-carved petal stamp to make the flowers with black staz-on ink.

- The flower stems and grass are portfolio (water soluble) wax pastels.
TIP:
For a softer look, you can paint over portfolios with a wet paintbrush. Or you can leave them AS IS, like I did, for more of a handmade, distressed, even childlike effect.

- The text around the butterfly was written using a silver metallic sharpie and outlined with a Pigma micron pen.

- Alphabet stamps for "take a leap of faith" are Sunny Lower Case by Hero Arts.

TIP: When stamping letters, to avoid running off of the right edge of a page, start at the edge and work backwards. To center text or a title, stamp the middle letter and work outwards.

Have fun and be sure to leave a comment if you try one of these tips!
Please feel free to share one of YOUR favorite tricks/tips?