31 March 2011

My "Soul Restoration" Story~Best $ Ever Spent


Looking back, I'm extremely grateful that I made the decision last November to gift myself with the "SOUL RESTORATION I" online workshop using the profits from my jewelry business. My life has been forever changed and enriched by the Brave Girl community where I've met so many brave and beautiful women. Thank you Melody Ross and to everyone involved for creating this ongoing online community where we can continue to support each other, share our stories, our inner journeys ~ it's made it alot less scary.

I took Soul Restoration I in January and have learned so much about myself and gained so many new tools for leading a more fulfilling life. A recurring theme, among those who take it, is that it came at the p-e-r-f-e-c-t time and that's how it felt to me. This course served to reinforce one of the biggest decisions I've made in my life... to quit my job 1.5 years ago for a better quality of life! Regardless of the financial strain, moments of insecurity and self-doubt, I no longer question that it was the right choice.

Unless you have taken the course, it would be hard to imagine the rich dialogue that takes place among BRAVE GIRL sisters! Taking part in the Soul Restoration discussion forums is how we lift each other up, offer support, share our struggles, lean on each other and can always find encouragement when needed. I have read hundreds of these amazing stories of transformation and lessons learned and it was in one of the forums where :: I :: learned how to finally get my mind around the concept of forgiveness and have been able to forgive the relative who molested me at the age of 5 (now deceased for 37 years), something I've been unable to do for two decades! I have also discovered new ways to protect my heart, my goals and my dreams so that I continue to remain true to myself. For these reasons and more, I am extremely dedicated to continuing the work on my Soul Restoration and plan to take SR II in June! I've even had more breakthroughs THIS WEEK!!

Since the class officially ended, I have kept the promise to continue writing in my journal and doing the "soul work." I will remain OPEN & TUNED IN to everything my heart, God and the universe are saying to me and have watched in amazement at how the creative ideas are flowing all over the place, in notebooks, notepads, loose paper, post-it notes ~ whatever's handy at the time. I am trying my best to organize the flow of inspiration, collecting them in a 9x12 zippered pocket and now carry ONE large notebook with me wherever I go.


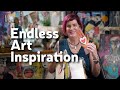
I am learning to draw, sketching non-stop, painting, making new friends online (something I’ve missed since I left my job and started a small jewelry business) and starting to work on my plan to teach in 2011. This is as real as it gets and I hope you will ALL be able to take part in this life-changing course one day very soon! Learn more about it at Brave Girls Club

You can read more about my transformation here.

21 March 2011

new addiction: tape


If I could point a finger (of thanks), it would be towards two lovely "art journalists" whom I've been excited about for several years: Juliana Coles and Kelly Kilmer! Lucky for us they are both Artist/Instructors so please check their websites for *tons* of inspiration and workshops.

Over the years, they've both shared their love of paper tape, masking tape also known as deco tape, washi tape and I recently found the idea QUITE impossible to resist... now that I've finally started art journaling myself AND ALL THAT THAT IMPLIES (more supplies, new techniques, learn, learn, LEARN!) I'm very excited about it and although my output is fairly low, I will share some of it very soon.

I also highly recommend the various NING communities as well for prompts, resonably priced classes, message boards, galleries and shared techniques.

Sources (S+H extra):

19 March 2011

"Gettin Dirty" Again


...my CODE for having paint/ink/glue all over my hands... which is when I'm the happiest! I've taken about a year and half break from mixed media art while focusing on creating and selling my artisan OOAK jewelry in local shops, craft fairs and on Etsy.

I decided the timing was perfect, to take a mini-break this winter, when I heard that Melody Ross was bringing Brave Girls Camp online with a workshop called Soul Restoration in January. That was the turning point for me! I signed up in early december and considered it a christmas present to myself.. a chance to set aside time for some soul searching and what she calls "soul crafting." It didn't disappoint because it has lit an Art Fire within that just won't quit! I am making art and continuing to really "buckle down and do the work" in my journal by keeping in touch with my TRUTH and mapping all of the journeys that my dreams will take me. And I am rejoicing because I know that my art is here to stay!

Basically, the camp is a 5-day retreat held in Idaho offering life-changing fun for women that you can read more about here. Melody says, "do you need healing...do you need help getting back on track? Do you need help remembering exactly who you are and what your dreams are....come join us...this stuff works....xoxox" The online workshop is a fabulous addition due to the overwhelming popularity of BGC, as the first 2 years of the retreat (2010 & 2011) have quickly sold out! Incredibly, 818 women from all over the world, are currently taking the first session of Soul Restoration 1 along with me... which ends on March 31.
I highly recommend this 6-week course and it begins again in 2 weeks!! Info here.
  • Soul Restoration 1 - "finding your truth" - April 5th - $99

Recently expanded!!

  • Soul Restoration 2 - "living your truth" - June 7 - $99

Check the youtube video to hear several students share their experience!

My art journal cover, above, was the very first project I tackled in SR (on Jan 11, 2011) and the first time I re-connected with my first love, mixed media art. I honestly feel as if I've been "broken open!" Thank you Melody and your entire team for a beautiful course and a job well done - XO. See you in June!

18 March 2011

Layers and Detail

best friends forever ATC by cookievf
best friends forever ATC a photo by cookievf on Flickr.

I came across the following description while glancing through some of my older pics on Flickr. Clearly, I document process & technique for sharing and for the fun i get out of looking back at something I created a few years ago.

"Truthfully, you don't realize how much work goes into these tiny treasures until you list ALL OF THE STEPS it took to create it!

13 Steps:
- patterned paper background,
- 2-3 colors distress ink
- taped to pre-printed "BACK" (name/date/email)
- stamped flower using clear ink,
- heat-embossed with copper - embossing powder,
- glued number transparency to background.
- matted printed photo onto torn vintage book page,
- distressed with ink
- cut square of blue mesh
- "popped" to card with foam tape.
- glued cardboard number
- edged with black sharpie
- glued purple microbeads to flower center

best friends forever ATC - created 0309"

12 March 2011

folder journal BEGINNINGS

I thought it would be fun to share the first steps of how I made my
special VALENTINE and what the table looked like, with two people working on the same project!


Take a look at Part II here and Part III here.

08 March 2011

TECHNIQUE: image transfer


There are a variety of ways to accomplish an image transfer, one of my very favorite techniques. I have achieved good results with a range of products, and have had equal success with both golden acrylic soft gel (matte), 8oz $10.22 USD and royal coat decoupage SATIN , 8 oz. $5.12 USD.

So far, I've used these five methods.

(1) TRANSPARENCY. print image onto a sheet of ink-jet transparency film, (spray with fixative) select a background and paint surface with a layer of soft gel. Place transparency ink-side down and brayer. peel back a corner to check your progress.. when image has (mostly) transferred - remove!

(2) GEL SKIN. First, select your image and cut it out. Apply soft gel like you're spreading butter on toast. let dry. repeat 5-10 times. roughen back with sandpaper, moisten with water & rub off paper backing with fingers.

(3) MY STANDARD. select a printed image and a background, apply a generous layer of soft gel to both and brayer for full saturation and coverage. Wait 1-2 minutes! Then peel back a corner to check your progress.. when image has (mostly) transferred - remove! Toner images work best but with trial-and-effort, meaning different sources for images, different substrates & varied drying time, (even FABRIC), you'll find there are MANY options. I have had most success with this method using vintage ledger paper.

(4) STANDARD. same as above but instead of peeling the image away from the background page, use sandpaper to roughen, moisten with water and rub backing off with fingers.

(5) PACKING TAPE. Select and cut out an image from a magazine or brochure. Apply as many strips of packing tape needed to cover completely. Submerge in warm water and remove once you're able to rub paper off with your fingers, sanding to roughen as that helps to get it started (but be careful, as always, not to remove too much). SOME MAGAZINES work better than others, so keep searching & testing... I can promise you that, as in life, the reward is worth the effort!

The trick with ALL of these methods is that the darker colors become more opaque while the lighter areas allow your background to show through. Be aware that text will appear reversed except when using gel skin and packing tape, where the "positive" image is used.

Here a few photos to illustrate the gel skin process:


In pic#5, you see a crisp, transparent image however, the final step in my journal shows a "milky" uneven finish to my transfer. An "ooops!" - here's what happened: instead of JUST spraying the back and rubbing the paper off.. I first dipped the image (with 8 layers of dry Royal Coat satin) into a tub of water for a few minutes - and that was my mistake. The front turned completely opaque and I was forced to use the reverse side which still retained a fine film of paper, no mater how hard I tried to remove it, even glaze it. LESSON: reserve the dipping step for packing tape transfers! Don't be afraid to make mistakes because trial-and-error is part of streching yourself creatively!


No art is bad art!


Mother's Day card 2009 made with gel skin method, described above. I cut-away the card behind the image, to show its transparent qualities, which is shown from the reverse at the beginning of this post.